Friday, March 9, 2012

anticipating restaurant week


So much eating!  So excited!  (Somebody did a ton of research & planning)

But for some reason gmail didn't think Top of the Hub was important to me..

Thursday, March 8, 2012

project sneak peekery

A shower update is coming soon.. I will say things are looking good!  (And nothing else has fallen off the wall haha).  As I should have mentioned before, the new grout in the shower would have to cure for 48 hours, followed by sealing then caulking, which needs ~36 hours before being exposed to water.  So things aren't officially done, but I will post the end results soon!

In the mean time, of course I had other things going on.  Here's a preview of posts to come (whenever I get to actually doing these things, that is).

1// Get this baby mounted!
This is our new toy (Samsung's UN55D8000 55" 3D LED HDTV)!  He will be mounted on the living room wall oh-so-beautifully on Sunday afternoon, replacing a similar sized but much clunkier version which currently monopolizes the top of the media stand.

2// Pick some paint!  (for the other bathroom, which is due for "renovation" as well)
Note: the top photo was taken on the kitchen floor - I was not sitting in the bathroom drinking tea haha.  

While the bathroom stuff was curing / drying / airing out I occupied myself with plans to make the other bathroom all spiffy too (this is where I have been showering in the interim, thank goodness for 2 full bathrooms).  Of course a repeat of the tile facelift will happen, along with fresh paint and other exciting things.  Now which color...

Sunday, March 4, 2012

bathroom (mis)adventures

To finish up my bathroom "renovation", I wanted to do a thorough cleaning of the shower tile to get rid of gross mildew, staining, and soap scum, and then patch up a few spots where the grout was loose.


All sounds pretty innocent and simple, right? I thought so.

Day 1:
I went to the store for the necessary goods - here is my arsenal:

[Clorox Bathroom Cleaner; Pre-Mixed White Tile Grout; Homax Grout Coating/Whitener; Homax Grout Sealer]
The plan was to:
1// clean grout and tile with the bathroom cleaner
2// clear out any loose grout and fill in all grout holes
3// coat grout with whitener
4// seal the grout
5// re-caulk everything, especially because corners were looking like this (ahhhhhh upclose shots are so scary):


Step 1 went smoothly (but some spots were definitely in need of the grout whitener!) At step 2 things got interesting. Before I started the soap dish looked like this:


Nice big gaps in the grout and of course I wanted to get the loose bits out. Maybe I was being a bit too aggressive, but this happened:


Ahh!! It's hard to tell in the photo, but a lot of the original mortar behind the dish was wet. And when I put the soap dish down, a ton of water poured out of the holes in the back. I panicked for a moment, then realized maybe it wasn't such a bad thing it fell off because the dish wasn't water tight and probably needed to dry out. After pulling mortar pieces down, the shower looked like this:


So pretty, right?! Haha... I also started pulling out the old caulking (shown in the left corner above) to find huge gaps between the tile and tub. Will have to fix that too. Sigh. At this point I turned on the bathroom fan and went out to see my friends - it's a good thing I left the apartment or I probably would have ripped all the tile down.

Day 2:
I started out today with another trip to the store in hopes of finding some manageable quantity of mortar / thin-set / tile adhesive to put that soap dish back up. I was worried I wouldn't find the right thing for a quick repair job, since the stuff is usually sold in 50lb bags. When I was about to give up and buy probably the wrong stuff (mortar crack filler, like for brick walls), I found a nice little 6oz bottle of tile repair adhesive. Yay! And while I was at it I picked up some bathroom caulk and a caulk gun.


The soap dish hole was looking fairly dry (maybe I should have waited longer but I want this done!) so I mixed up a small batch of adhesive and applied to the back of the soap dish.


When I smooshed it on the wall it actually felt secure and suctiony which was very reassuring, but I pulled it off quickly to make sure the back was completely covered.


Success. Now I'm letting it dry for the prescribed 3 hours before grouting supported by masking tape to prevent droopiness)


The adventures will continue...

ps. Some cute encouragement from my dad (yes, diy is the way to go!):


*Note:  Post contains affiliate links

Saturday, February 25, 2012

DIY closet revamp {part 2}

I never posted after revamping my closets back in September. I didn't take proper before photos, so here's one I dug up from before I moved in:

The bedroom has two closets - one awkwardly behind the bedroom door and the other in the mini-hallway to the bathroom. The closets had typical bi-fold doors with dated brass knob (and also notice the white walls and carpet). Inside was also pretty basic and certainly did not maximize storage - notice how neither closet has a proper hanger rod and how the left closet just has a super deep shelf in the left (deeper) side:


My closet upgrades happened in two phases:
1// I replaced the interior shelves with shiny new ones from the Container Store (elfa).
2// I converted the bi-fold doors to "French" doors and added new handles.

Going in chronological order, the interior upgrades
allowed for multiple shelves as well as multiple levels of hanging space (hallway closet):

At the bottom there is space for a small suitcase and bins for clothes awaiting hand washing and dry cleaning.

This upgrade also really took advantage of the space in the other closet, which has two different depths. On the left (deeper) side I was able to include an additional hanging rod for dresses, and shoe racks running the entire depth. There's even room for my steamer to hide in there now!


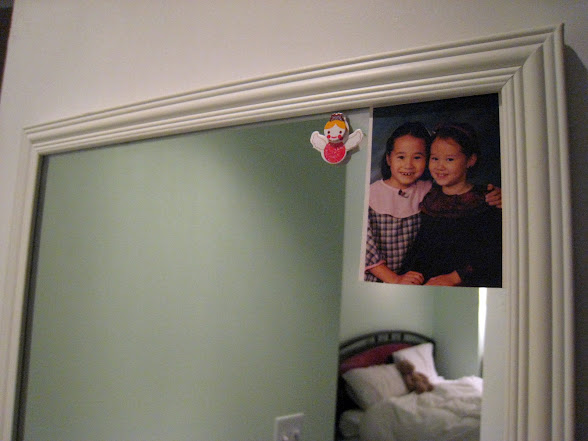
Some of the major advantages to converting the doors are the increased access and the extra hanging space on the back of doors for purses (above) and a mirror (yes, that's little versions of my sister and me!):


As for the bi-fold to French door conversion, I first took the doors down and removed the hinges which had previously held the two pieces together. In typical bi-fold doors, one side is anchored to the floor and the top track while the other side slides. I modified the sliding side to also be anchored by adding hardware to allow both doors to swing open independently (ahh the closeup is ugly I promise I vacuum!):


After patching up holes from the hinges and adding a fresh coat of paint, I attached a magnet to each closet door frame and metal strikers to the backs of the newly separated doors to keep them from swinging around all crazy:


Finally, I added the new handles and voila!


For funsies, the before and after again:


friday night is...

...sushi date night! Complete with dirty martinis, fizzy moscato, and of course sushi! Another little "tradition" we love. Here's a selection of what we had last night (delivery from Fin's). Clockwise from top: Christmas maki, Idaho maki, Rainbow maki, Alaskan maki, and Mexican maki. Yum..


All served on the sushi dunk plates I got us for Christmas (from CB2). Aren't they fun?!