Here's where we end up:

Now let's see how we got there, yea?
Incase you missed it and want to catch up, you can find Parts 1 and 2 of the hallway bathroom facelift here and here.
9// Installing a vanity top
Last time I showed you how we custom designed our St. Paul vanity top, which arrived promptly and then sat on our living room floor like this:

I was dying to install it, but we had some demolition to do first! As a reminder, here's what the vanity top, sink, etc. looked like before:


The old vanity top was one of those particleboard laminate things, which had certainly seen better days. At this point we had already cleaned up the vanity base (so those seams and screw holes in the photo above were disguised nicely).
The next step was to rip that baby off! There were a few screws securing it, but it mostly took cutting some paint and sealant, disconnecting the plumbing (after shutting the water off which was a battle because one of those valves just didn't want to turn.. we almost gave up here too), and then giving it a good tug. Then we were here:

Here's the plumbing and other scariness behind those shelves:

After doing some quick cleaning, we just dropped the new guy into his home:

We knew we would have to lift the top again to remove the plastic and apply silicone before calling it good, but first we had an old vanity top and sink to dispose of and some plumbing to fix.

(Yes, we disguised the sink in a Crate & Barrel bag.)
10// Fixing some plumbing
I knew this would be a problem from back when we were designing our vanity top, but figured we'd deal with it when the time came. Then the time came. Here's the problem:


Because our beautiful new sink is larger than the old sink, the new sink's drain doesn't align properly with the old plumbing.
The old pipes were pretty rigid with soldered joints, which made it impossible to just twist everything into place. We did some research and our first thought was to just get a flexible drain assembly to jig things over. The tailpiece was also too long so we'd need to replace it with a shorter one.
 Approach #1 was
to buy a blowtorch, sweat the pipes (fancy plumbing speak for melt that
solder off), and replace the tailpiece with a shorter one. Then install
the flexible / accordion tailpiece as a connector and call it good.
Approach #1 was
to buy a blowtorch, sweat the pipes (fancy plumbing speak for melt that
solder off), and replace the tailpiece with a shorter one. Then install
the flexible / accordion tailpiece as a connector and call it good. When we were in Home Depot searching for our blowtorch, the guys there suggested we get a hacksaw instead of the blowtorch and just cut the tailpiece shorter - much easier and safer.
 So we went home with a hacksaw and a flexible drain assembly - Approach #2!
Then we did some thinking and more research because we didn't love the idea of this flimsy accordion plastic thing as our drain. People seem to do this, but it also seems to be frowned upon by the people who do it right.
We wanted to do it right.
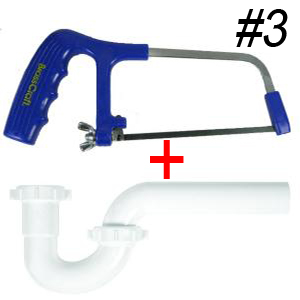 So we came up with Approach #3: use the hacksaw we had already purchased to cut the plumbing off before the p-trap, and install new plumbing from there up to the sink. This way we could set the lengths and angles to align nicely, and our plumbing would be nice and solid.
 This approach was more intimidating, since it's usually recommended to keep as much of the existing plumbing as possible (as long as it's in good condition), but it seemed like the most professional way of doing things.
We ran with Approach #3 and came home from Home Depot with this:


The rest actually went surprisingly smoothly. First we drained the water from the p-trap (which is there as a barrier to prevent sewage smells from entering your home - didn't know that before!)...

...then cut that pipe...

...and then put in the new stuff!

I didn't document the last bit so well, but it was actually pretty straightforward, although a little scary. Essentially this is where the plumbers putty and plumbers tape from above were critical to prevent leaks at the joints. We had to undo and redo our work a few times to get proper seals, but when we were done it was leak-free! (We didn't turn the water on yet, but poured some water in the top using a bowl to test our work.)
Yay!

At this point we also secured the vanity top and installed the back splash and side splashes. It's official - the vanity top is in!
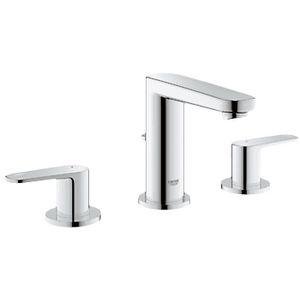
11// Installing the faucet
We had spent forever trying to pick the right faucet. This decision process began way back when we were picking lights and designing our vanity top. We decided to stick with an 8" spread faucet rather than a single handle / single hole design, because we thought the latter would look too sparse on such a large top.
Long story short, we ended up pulling the trigger on this guy from Amazon:
We laid everything out and just followed the directions!

We had to go back to the store one last time to get new, flexible supply lines since the old ones just wouldn't budge, and actually started to leak when we tried to force them into place (scary!). Finally we ended up here:


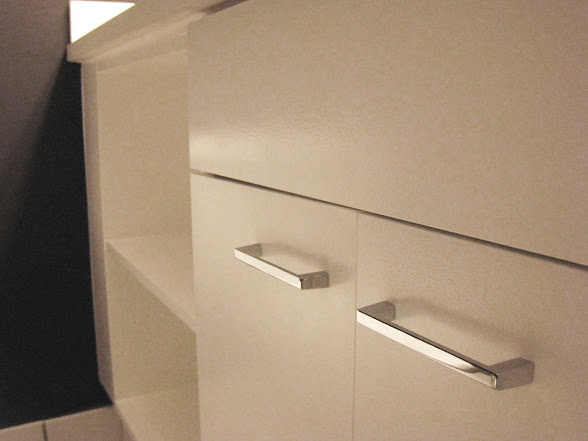
And I could finally put the doors back on! (And you can see in the photo above that I got rid of that crazy checkerboard stuff in the cabinet base.)
Snapping that last photo felt so, so satisfying. But if you ask Adam, his favorite is the plumbing (4 photos above).. so proud!
Thanks so much if you actually read this far! Next time we'll cover some bathroom accessories and installing the shower door!
No comments:
Post a Comment