Monday, March 26, 2012

dining nook {reveal}

A week or so ago I mentioned a pending project involving the installation of a pendant light, which I actually completed the very next day but just hadn't gotten to posting.  So here it is.

Before, the nook looked like this:

It seemed a bit haphazard to me and was wanting some dressing-up.  My apartment is blessed with high ceilings but I haven't fully taken advantage of that height, with the exception of the curtains.  I wanted to add a chandelier / pendant of course for the functionality, but also to anchor the dining area and draw attention to the height of the room.  There was a cover plate on the ceiling which I hoped indicated the presence of a live junction box, but was not completely sure.  So we borrowed a ladder from maintenance and took a look.

So far so good.  I had to do a bit of sanding to remove excess paint that had built up around the cover but otherwise the process was quite painless.  After a quick consultation with my dad regarding where to attach what to hook up the light switch, and then with Adam to guesstimate the height, we ended up with this:

Loving it!  I thought the shade's diameter would be too small but actually with the extra height I think it fills the space well.  And the design allows for soft light to come through the shade while actually lighting the table quite brightly.  Overall, a great success!  And probably the most impact for $20 in the apartment so far. 

Saturday, March 24, 2012

saturday brunch

Following a Thursday night Burrito Night (which is pretty much every week), the leftovers are repurposed for Saturday brunch!  We just scramble the burrito filling and any leftover rice with eggs + salt + pepper + shredded cheese.  Then hash browns on the side and lots of ketchup.  Delicious!  And super filling to get us through most of the day

Saturday, March 17, 2012

dining nook preview

I have been searching for the longest time to find a chandelier / pendant light that is justright for the dining nook.  There are just so many options and so many directions I could take - something more glam like a crystal chandelier, something uber-modern, a little mid-century mod, something kinda traditional.. and on and on.  When I feel indecisive like this I turn to my buddy Photoshop to visualize.  Here are some options:

The one on the left is a craigslist find I have been considering, as well as some urchin looking thing that is a lot prettier up close, and a standard Ikea pendant.  Still no clue.

Well we went out for a walk today and in trying to hide from the swarms of green-clad 20somethings trying to get into all the Boylston bars (happy St. Patty's Day to you all), we ducked into Crate&Barrel.  And in the little sale corner we found this guy:

For $20!  Yesssss.  Not sure if it's exactly what I want for the dining area but it's a great start.  And really, just the pendant cord and mounting plate would cost more than that from most places.  Excited for another project!  And yes, I will also post about the wall mounted tv, which looks AMAZING btw. 

Wednesday, March 14, 2012

happy pi day!


ps. a tv update is coming soon! (once we have power in the Back Bay again)

Sunday, March 11, 2012

tiny homes

Although I don't aspire to live in a smaller space than what I currently have, it's always a great reminder (and inspiration) to see what people can do in tiny spaces.  Check out this prototype of small living:
Small rooms and dwellings set the mind on the right path, large ones cause it to go astray.  - Leonardo da Vinci

(if you like this, check out the other example I posted a bit back)

Saturday, March 10, 2012

bathroom (mis)adventures {part 2}

I am pleased to announce my shower "renovation" has been successfully completed!  Actually I have yet to shower in there but here's hoping nothing completely unexpected and tragic happens when I do. 

As a reminder, my plan was to:
1// clean grout and tile with the bathroom cleaner
2// clear out any loose grout and fill in all grout holes
3// coat grout with whitener
4// seal the grout
5// re-caulk everything

In my previous post, I had gotten #1 and part of #2 done when I got diverted.  Picking up where I left off, here are the rest of the details, and the final reveal! 

Day 2, continued:
I waited the prescribed 3 hours for the soap dish to get nicely re-secured to the wall:

As that was wrapping up, I tackled the rest of the caulking.  I was mildly horrified to discover most of it was wet when I pulled it out, indicating leaks.  When all those bits were cleaned up, we were looking like this:

Time to fill all those gaps with grout!  It was so easy - I just cut the tip of the grout tube's nozzle at an angle as instructed and it formed the perfect applicant.  I didn't take any action shots but here's my first attempt (filling the gaps got easier as I got the hang of it):

Following instructions, I wiped up the excess and then let the stuff dry for a good 48 hours before moving on.  

Day 3:
I couldn't quite wait 48 hours before doing anything, so I started applying some of the whitener.  As a reminder, here's my arsenal:
The whitener is applied with the foam nozzle - I felt a bit like I was using white-out for the grout.  Which is guess is essentially true haha.  You're supposed to let it dry 4+ hours then wipe the excess off of the tiles, which was really easy.  Here's an after shot (also, notice the fixed soap dish!)

Day 4:
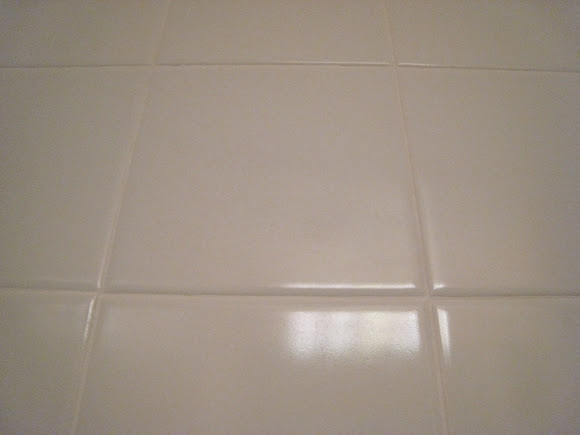
With all the grout dry, I finished up applying the whitener and after it dried, the sealer.  Steps 3 and 4 done so quickly!  The sealer made no visual difference but here's a photo anyway - look how white!!!!

Thennnn finally #5, caulking!  I also took no action photo here but mostly because it was a mini-disaster as my first attempt using a caulk gun.  I finally got it right though.  Took 2 layers though because I didn't put it on thick enough the first time.  

THE REVEAL:


YAYYYYYYY

*Note:  Post contains affiliate links

Friday, March 9, 2012

anticipating restaurant week


So much eating!  So excited!  (Somebody did a ton of research & planning)

But for some reason gmail didn't think Top of the Hub was important to me..

Thursday, March 8, 2012

project sneak peekery

A shower update is coming soon.. I will say things are looking good!  (And nothing else has fallen off the wall haha).  As I should have mentioned before, the new grout in the shower would have to cure for 48 hours, followed by sealing then caulking, which needs ~36 hours before being exposed to water.  So things aren't officially done, but I will post the end results soon!

In the mean time, of course I had other things going on.  Here's a preview of posts to come (whenever I get to actually doing these things, that is).

1// Get this baby mounted!
This is our new toy (Samsung's UN55D8000 55" 3D LED HDTV)!  He will be mounted on the living room wall oh-so-beautifully on Sunday afternoon, replacing a similar sized but much clunkier version which currently monopolizes the top of the media stand.

2// Pick some paint!  (for the other bathroom, which is due for "renovation" as well)
Note: the top photo was taken on the kitchen floor - I was not sitting in the bathroom drinking tea haha.  

While the bathroom stuff was curing / drying / airing out I occupied myself with plans to make the other bathroom all spiffy too (this is where I have been showering in the interim, thank goodness for 2 full bathrooms).  Of course a repeat of the tile facelift will happen, along with fresh paint and other exciting things.  Now which color...

Sunday, March 4, 2012

bathroom (mis)adventures

To finish up my bathroom "renovation", I wanted to do a thorough cleaning of the shower tile to get rid of gross mildew, staining, and soap scum, and then patch up a few spots where the grout was loose.


All sounds pretty innocent and simple, right? I thought so.

Day 1:
I went to the store for the necessary goods - here is my arsenal:

[Clorox Bathroom Cleaner; Pre-Mixed White Tile Grout; Homax Grout Coating/Whitener; Homax Grout Sealer]
The plan was to:
1// clean grout and tile with the bathroom cleaner
2// clear out any loose grout and fill in all grout holes
3// coat grout with whitener
4// seal the grout
5// re-caulk everything, especially because corners were looking like this (ahhhhhh upclose shots are so scary):


Step 1 went smoothly (but some spots were definitely in need of the grout whitener!) At step 2 things got interesting. Before I started the soap dish looked like this:


Nice big gaps in the grout and of course I wanted to get the loose bits out. Maybe I was being a bit too aggressive, but this happened:


Ahh!! It's hard to tell in the photo, but a lot of the original mortar behind the dish was wet. And when I put the soap dish down, a ton of water poured out of the holes in the back. I panicked for a moment, then realized maybe it wasn't such a bad thing it fell off because the dish wasn't water tight and probably needed to dry out. After pulling mortar pieces down, the shower looked like this:


So pretty, right?! Haha... I also started pulling out the old caulking (shown in the left corner above) to find huge gaps between the tile and tub. Will have to fix that too. Sigh. At this point I turned on the bathroom fan and went out to see my friends - it's a good thing I left the apartment or I probably would have ripped all the tile down.

Day 2:
I started out today with another trip to the store in hopes of finding some manageable quantity of mortar / thin-set / tile adhesive to put that soap dish back up. I was worried I wouldn't find the right thing for a quick repair job, since the stuff is usually sold in 50lb bags. When I was about to give up and buy probably the wrong stuff (mortar crack filler, like for brick walls), I found a nice little 6oz bottle of tile repair adhesive. Yay! And while I was at it I picked up some bathroom caulk and a caulk gun.


The soap dish hole was looking fairly dry (maybe I should have waited longer but I want this done!) so I mixed up a small batch of adhesive and applied to the back of the soap dish.


When I smooshed it on the wall it actually felt secure and suctiony which was very reassuring, but I pulled it off quickly to make sure the back was completely covered.


Success. Now I'm letting it dry for the prescribed 3 hours before grouting supported by masking tape to prevent droopiness)


The adventures will continue...

ps. Some cute encouragement from my dad (yes, diy is the way to go!):


*Note:  Post contains affiliate links